
Permanent lip makeup
A natural lip tone that does not wear off or smudge
- A natural shape and tone in the watercolour technique
- The result lasts at least 1.5 years
- Takes up to 2 hours
Booking takes less than a minute
My Works
Reviews from clients
Hi, I wanted to say a big thank you for the permanent lip makeup! ❤️ I really, really like it, such a beautiful shape, and the peeling finished today. The lips may go a little lighter, but it is very beautiful. For the first time in my life I like my lips. 😄 I cannot stop being happy about it. If I want a refresh in the future I will definitely come to you, and I will recommend you to others! Thank you so, so much! 🥰
Hello, I wanted to say a big thank you for the work on my lip PMU! I really like the result, the tone came out like my favourite neutral pink lipstick! After the touch-up it healed for longer than the first time, but with no trouble. Thank you so much again!!! 💗
Hi. Thank you for asking 🙂 I had already forgotten that I was meant to report back 😄 Everything healed, it looks very good, thank you ☺️
Hi! All is well, thank you! The healing was smooth, there were no scabs 👍🙏
Good morning! The result came out very, very beautiful - it is expressive, especially the outline. And no cold sore came up, which matters too 😄 Thank you so much ☺️ very fine work! When I am ready for the eyeliner, I will let you know!
Hi! This time a proper cold sore came up, but now it has healed and I really like it - the colour is great! Thank you so much!
Good morning! I am glad to report that this time everything is excellent. The lower lip had healed after a couple of days I think, on the upper lip a few small cold sores came up along the line, but today it looks as though it will pass with no consequences. The colour is wonderful. Thank you for your work! ❤️
Hi! Everything healed very well, there are no gaps anywhere and I am happy with how it looks! Thank you so much for your work 🙏
The whole process was completely without scabs, which really surprised me! Now the tone is soooo beautiful, pink and soft, but noticeable at the same time. When I have done my makeup I put on a lip gloss and it is a BOMB! I do not have good photos right now, and the light is bad for taking any, but I will try to take some tomorrow... I did not photograph the process, but there were no scabs and no dryness at all. Only the next day, when I was at Summer Sound, with the wind and the sand I put on more balm. That was all! Beautiful! ❤️ I am getting compliments from my friends! And I have shared the link to your profile with a couple more girls - they all admire it and are getting ready to come to you 😏☺️
I really like it, I do not need lipstick any more, I put on a gloss or a balm and I am done. Thank you for your work!
Hi! Sorry, I forgot to write sooner, but everything is very good. It healed quickly and now it looks excellent! 😌
What permanent lip makeup is
Permanent lip makeup is the second most popular procedure, right after brow micropigmentation. It gives a long-term result, and the lips look perfect for years afterwards. Modern techniques reach a highly aesthetic result, so you will no longer need makeup every day. Permanent eye makeup works the same way, replacing the daily eyeliner.
Types of lip micropigmentation technique
Permanent lip makeup is done with several different techniques. A wide palette of pigments can be used during the session to create different effects - volume, colour transitions, a defined outline. Which technique is used depends on the final result the client is after. Some of the techniques that can be used are described below.
-
Watercolour technique
This is considered one of the most popular techniques, because it creates lips that look natural and perfectly shaped. The artist applies pigment in a single tone, with no colour transitions. It is very fine work that brings out your natural beauty and shifts the colour slightly without changing your appearance radically. Watercolour makeup visually widens narrow lips. It is favoured by women who want to look as natural as possible. -
Lipstick technique
This kind of permanent lip makeup suits women who simply cannot picture their look without lipstick. The technique is very close to classic makeup and keeps you looking perfect at all times. More pigment is used, the shading is denser and covers the whole lip. The outline is sharper and more defined. The result looks as if the lips were coated in a high-quality matte lipstick. -
3D lip technique
This technique is relatively new but keeps gaining popularity. The idea behind the 3D method is that several tones are used at once, which creates a colour transition (an ombre effect). The right combination of tones makes the lips look visually fuller.
It is worth noting that there are many techniques around now - lip blush, frozen lips and so on. New ones mostly appear because artists come up with new nuances and play with colour transitions. Visually, though, the difference is not always obvious. Look carefully at work by an artist that has already healed, because lips right after the procedure differ a great deal from how they will look once healed. Then choose the technique you like the look of most.
The watercolour technique - my choice for the lip procedure
The watercolour technique is my favourite. It lets the pigment go on very naturally while keeping soft transitions between the lines and rich tones. The result is a very natural yet bright and striking look. Makeup done with this technique holds for at least a year and a half. It can give both a natural lip look and a deeper, brighter tone.
How long the procedure takes
The time can vary, but count on about 3 hours, which covers talking through what you want, drawing the sketch and the procedure itself.
How the procedure goes
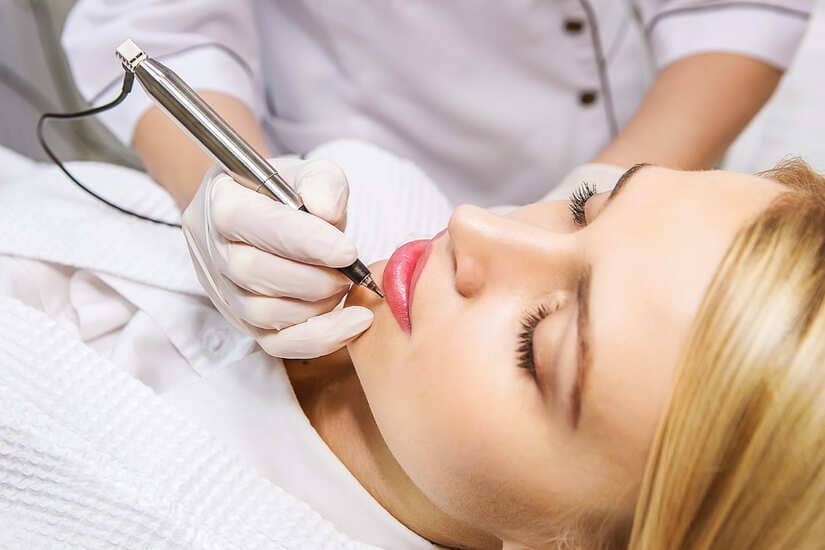
- The client arrives for the procedure. We talk through how it will go, then fill in and sign the client form.
- So the client can see the plan and the artist has guidelines for the working area, a sketch of the permanent makeup is drawn in that area with special pencils. Both the client and the artist have to approve it. The artist judges as a professional how well the shape and colour suit this particular person, while the client has to feel completely comfortable with the chosen shape on their own face.
- The artist starts the procedure.
- The artist gives you the aftercare instructions.
- After 4-8 weeks the procedure is repeated. The artist corrects the permanent makeup (the tone and any gaps as well, if needed) to reach a flawless result.
Contraindications
In some cases the permanent makeup procedure should not be done at all. Any of the conditions listed below means the procedure cannot be carried out. In individual cases, after consulting the artist and obtaining written permission from a doctor, it may still be possible.
- Hepatitis
- Diabetes
- A tendency to form keloid scars
- Psoriasis
- Skin conditions – dermatitis, herpes, eczema, rosacea, folliculitis, furunculosis, angioedema and others
- HIV and AIDS
- Epilepsy
- Heart conditions
- Hypertension (high blood pressure)
- Autoimmune diseases
- Haemophilia (a blood clotting disorder)
- Serious internal organ diseases
- Being under the influence of alcohol or drugs
- Alcohol and blood-thinning medication – the area weeps more, which strongly affects the result
- Severe mental disorders
- Pregnancy and breastfeeding – the outcome cannot be predicted. After the first trimester the risk drops. Every mother has to weigh up for herself whether she needs the procedure
- Peels, dermabrasion and other traumatic cosmetic treatments. Once 40 to 60 days have passed, permanent makeup may be done with a doctor’s permission
- Botox and similar (depending on the area) - permanent makeup must not be done before or after botulinum injections (at least 4 weeks have to pass)
- A high temperature - the procedure has to be moved until you have fully recovered. After a course of antibiotics, wait at least 2 weeks
- The menstrual cycle - pain is felt more keenly just before and during your period. The middle of the cycle is the best time
- A facelift – only in agreement with your doctor, once the tissue has fully recovered
- Sunburned or frostbitten skin
- A flare-up of allergies
- Chemotherapy and radiotherapy - the procedure is only possible during remission
- Inflammation on the skin
- Menopause
How to prepare for the procedure to get the best result
It is very important to follow every recommendation before and after the procedure. It directly affects how the session goes and how the skin heals. For example, if you have had a peel or waxing in the treated area, the procedure itself will be painful and traumatic. And if you sunbathe afterwards or pick the crust off, it will affect how much pigment stays and the procedure may have been for nothing.
What you must do before the procedure
- In the week before the procedure, do not experiment with new face masks, creams or other products that could cause an unexpected skin reaction.
- Have facial waxing above the upper lip no later than 3 days before the procedure, as it injures and irritates the top layer of skin.
- If a rash appears in the treated area, tell the artist. If it cannot be worked around, it is better to move the appointment.
- For at least a week before the procedure, pay particular attention to moisturising. If your lips are very dry, use a gentle lip scrub and nourish them with lip balms.
- To avoid a herpes outbreak after the lip procedure, ask your doctor for suitable medication to take on the day of the procedure and before and after it. An outbreak appears no later than the 4th day after the procedure. It affects healing and the result. Cream products against herpes that contain no zinc may also be used afterwards.
- Do not drink coffee or smoke before the procedure.
What not to do after the lip PMU procedure
- Do not get the pigmented area wet for the first 2 days.
- Do not scratch or rub the treated area, or catch it with a towel when drying your face.
- For the first 10 - 14 days avoid saunas, pools, long baths, swimming and intense training.
- For the first 10 days (or longer, if the crust has not come off yet) do not use makeup or skincare on the treated area or within 1 cm of it.
- Do not touch the crust. It matters that the skin regenerates on its own.
Aftercare instructions
- Stay out of direct sunlight and away from sunbeds for at least 1 month after the procedure.
- If you carry the herpes simplex virus, follow your family doctor’s instructions on antiviral medication.
- Care for the lips with a moisturising balm as often as needed to keep them comfortable and soft.
How the skin heals after the procedure
Let us go through the recovery day by day, so you know what to expect and are ready for it. The skin can be considered restored 28 days after a permanent makeup procedure. The dermis heals over the first 7-10 days; the rest of the time is needed for the pigment to settle and stabilise.
Day one
Right after the procedure the shape and outline look very sharp and bright. Slight swelling and redness can appear - that is a normal reaction. The swelling usually goes down within a couple of hours, though it is individual and may pass sooner or later. Because the dermis has been injured and the immune system responds, lymph fluid often seeps from the open wounds. Blot it gently with a cotton pad each time.
Day two
The next day the pigment looks even brighter, and that is normal. Lymph fluid may still seep out - blot it the same way as on day one. Remember that greasy ointments and creams block the skin and stop it breathing.
Days 3-7
The skin heals gradually and crusts form. If you did everything right, they are barely noticeable and look like light flaking. The treated area may start to itch. Be patient and do not scratch, so you do not injure the still thin, unprotected skin.
Days 10-14
The skin has healed but is still thin and easily injured. The flaking gradually stops. The itching has eased and the colour has become lighter. Cosmetic treatments, the sauna and the pool are still not advisable.
After 2 weeks
The dermis has recovered and you can start using makeup again. The pigment is still settling at this stage, so the colour may change - it can turn richer or fade almost completely. That depends on your body; it is individual. Small flaws may appear, such as gaps, or the outline may look slightly blurred. All of them are corrected at the touch-up.
Permanent lip makeup prices
| Procedure | Price € | Duration |
|---|---|---|
| Permanent lip makeup, watercolour technique | 180 | up to 2 hours |
| Touch-up | 80 | up to 1.5 hours |
| Repeat touch-up | 30 | As needed |
| Yearly lip refresh on my own work | 140 | up to 1.5 hours |
All procedure prices in one place - full price list
Frequently asked questions
-
How much does permanent lip makeup cost?
The procedure costs €180. The touch-up costs €80.
-
How long do permanent lips take to heal?
The skin can be considered restored 28 days after a permanent makeup procedure. The dermis heals over the first 7-10 days (the crust forms and comes off during those days); the rest of the time is needed for the pigment to settle and stabilise.